LiveSYNC on Oculus Go
Setup
The Oculus app
When you receive your Oculus Go headset, unpack it and start the initial setup procedure. It might be a bit surprising, but you must install an application to your phone:
To set up and connect your Oculus Go, you'll need to download the Oculus app on your supported mobile phone. With the Oculus app, you can set up your headset, browse VR games and apps and customize your device settings. (Oculus Go website)
This accompanying app is mandatory during the initial setup of the headset. After that you will need it very rarely, if ever. If you plan to purchase multiple headsets, they can be all set up and configured from a single phone. Download the Oculus Go app from here:
Alternatively, you can use these direct links for Android and iOS.
Note
This is NOT the same app that you use with a GearVR headset. Both apps have the same name Oculus. You can differentiate them from the icon: GearVR app icon has text GearVR, Oculus Go app icon does not have any text.
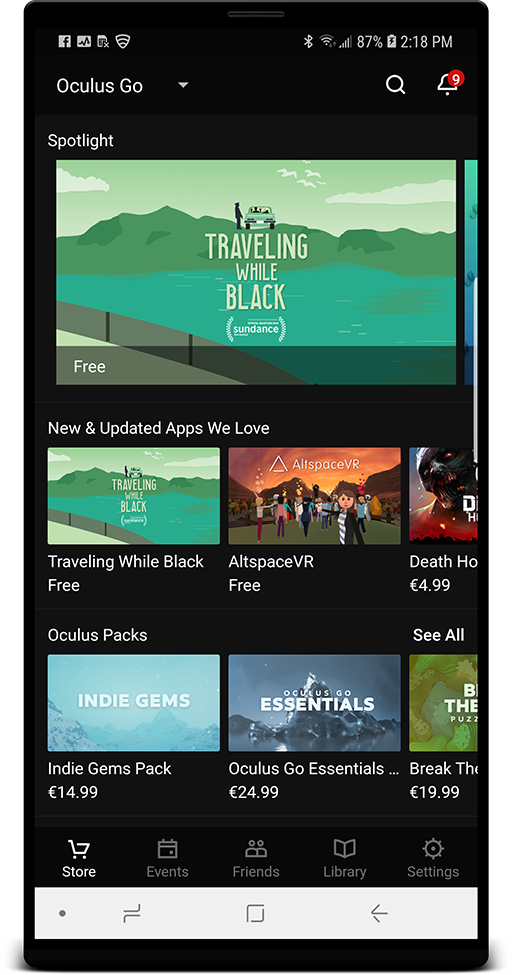
The Oculus Go accompanying app on an Android phone.
Pairing & setup
Follow these steps to pair your phone with the headset and go through the initial setup.
-
Download the Oculus app using one of the links above, then launch the installed app.
-
If you don't have an Oculus account yet, sign up first, and then log in.
-
Once logged in, navigate to Settings, and select Pair New Headset.
-
From Choose a Headset menu, select Oculus Go, and press Start Now.
-
Turn on your Oculus Go device. Press Continue.
-
Plug your Oculus Go into a power source. Press Continue.
-
After search completes, found headsets are listed. If multiple devices were found nearby, choose the one with the matching serial number. The number is printed below a QR code under the fabric of the head strap, near the USB connector. Press Continue.
-
Select a Wifi access point that will be used for connecting the headset to the network. Press Continue.
-
Put a battery into the controller and choose with which hand you want to use your controller. Press Continue.
-
Select language to use in VR. Press Continue.
-
Add a payment method (a credit card or a PayPal account), or press Skip. You will need a payment method only for making purchases from the Oculus Store.
-
Go through safety etc. information. Press Continue.
When ready, you will see a dialog saying Preparing your Oculus Go.... Once it has finished, pairing and setup has completed.
For more information, see the questions and answers here.
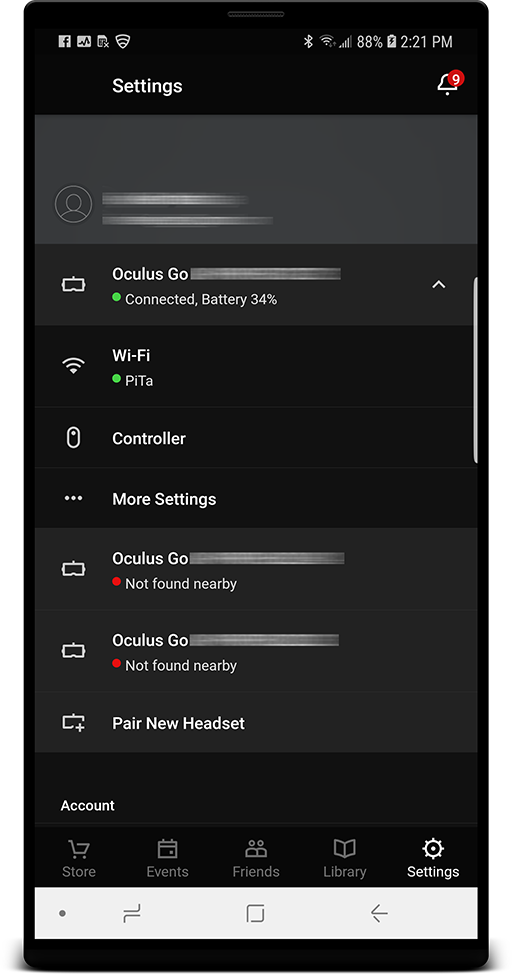
Once pairing and setup has completed your headset(s) will appear in the Settings tab.
First time use
Go to your Oculus Go device. Make sure that power is on and then put the headset on your face. There is an infrared proximity sensor inside the headset (between the lenses). The headset will wake up automatically and you will hear a greeting sound. Adjust the head strap so that you feel comfortable.
Grab the hand remote controller, look straight ahead, and point with the controller to the direction you are looking at. Then, press and hold the Oculus button (the one with the ring symbol) on the controller. This procedure will calibrate the controller.
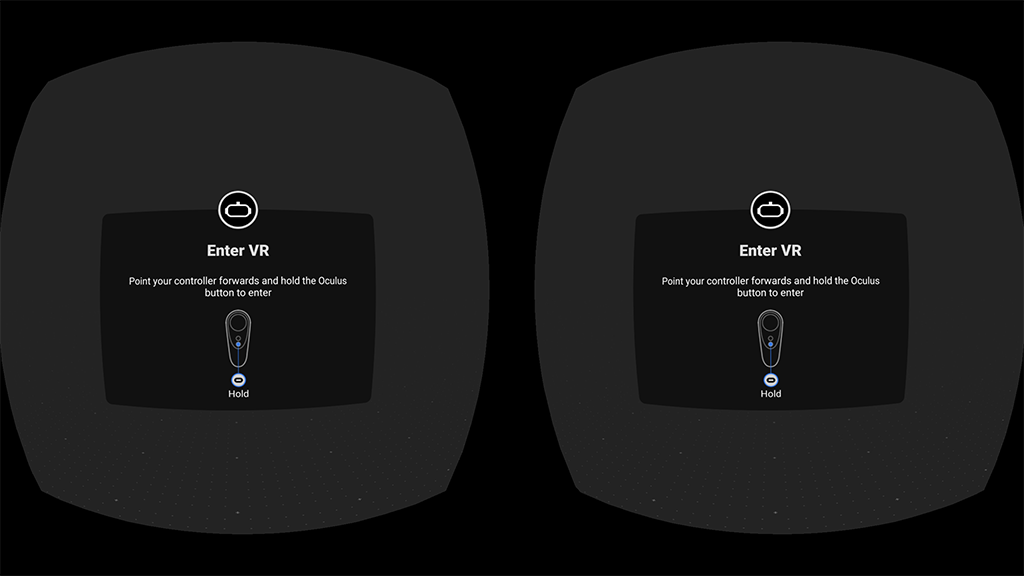
Whenever the device wakes up from sleep you must calibrate the hand remote controller.
Note
Every time the headset wakes up from sleep it will present the calibration dialog. Calibration is necessary, because the headset and the hand remote controller are two independent devices. They are both only aware of rotation around their own center point. Moreover, the devices do not know what actual direction they are pointing at (for example, North, South-East, etc.). Hence, they need to be calibrated by making them point to the same direction and then pressing a button to signal this. Unfortunately, this needs to be repeated every time the headset wakes up. Sensors are turned off to save power during sleep, hence they will lose the tracking.
After calibration and first time use tutorial you will enter Oculus Home. Here you can install new apps, start installed apps, configure the headset, and use services offered by Oculus.
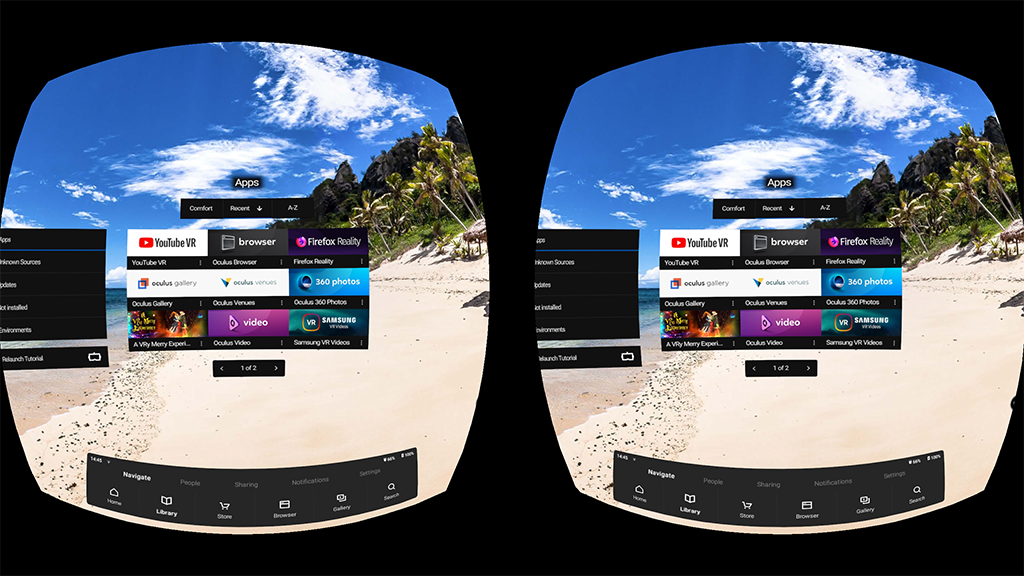
The Oculus Home.
Note
The image above is a screenshot from the headset's internal display. The device renders a heavily distorted double barrel view on the screen. You will not see the barrels nor the distortion when you wear the headset and look through the lenses. In addition, your brain will combine left and right eye images together. You will experience VR as a 3D world, although your field-of-view in VR is narrower than in real life.
In this documentation, we frequently use either double barrel view or single barrel view in screenshots from a VR headset. A single barrel view is simply a double barrel view cut in half to save screen space.
Tip
We recommend that you spend some time to play around with the device. Get familiar with the hand remote and Oculus Home. Try a couple of pre-installed apps. Ask your boss a permission to take it home for the weekend and watch a couple of movies from Netflix or Youtube VR.
Installing LiveSYNC
Once you feel familiar with Oculus Go, it is time to install the LiveSYNC app. The installation can be triggered either via the accompanying Oculus app on your phone (outside VR) or via Oculus Home (inside VR).
Note
Check out the built-in setup wizard in the Android version. The wizard guides you through the whole process with a few clicks. Using the wizard is described in the LiveSYNC User Guide (Option B).
-
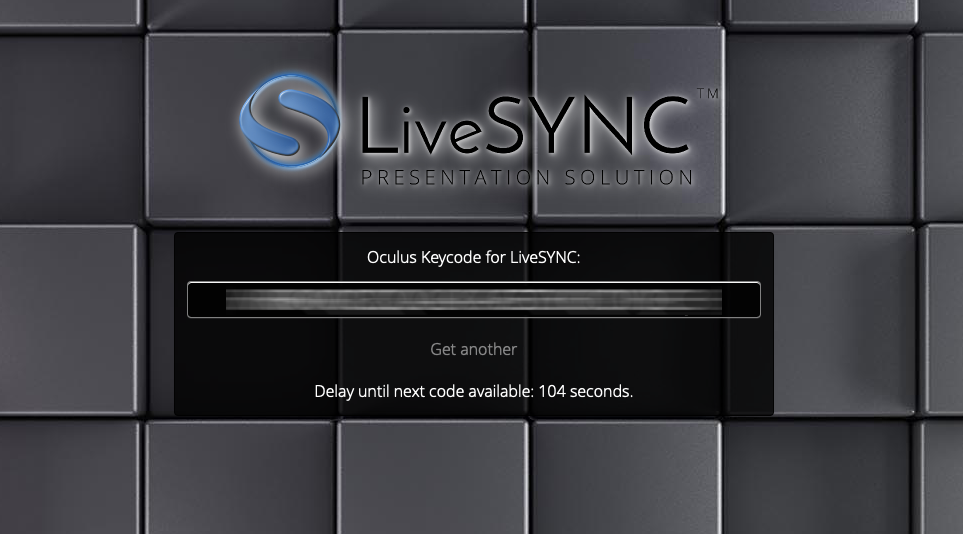
Installing apps via Oculus Keys distribution requires a 25-character key. You can get your personal key for unlocking the LiveSYNC app for FREE from here:
Note
You will need only one key for unlocking the app for one Oculus account. Notice that you can use the same Oculus account on multiple headsets. For example, if you have 8 Oculus Go headsets, you can use a single account on all of them. Thus, typically you need to get and redeem only one key. The website allows retrieving multiple keys, but there is a time lock to prevent abuse.
-
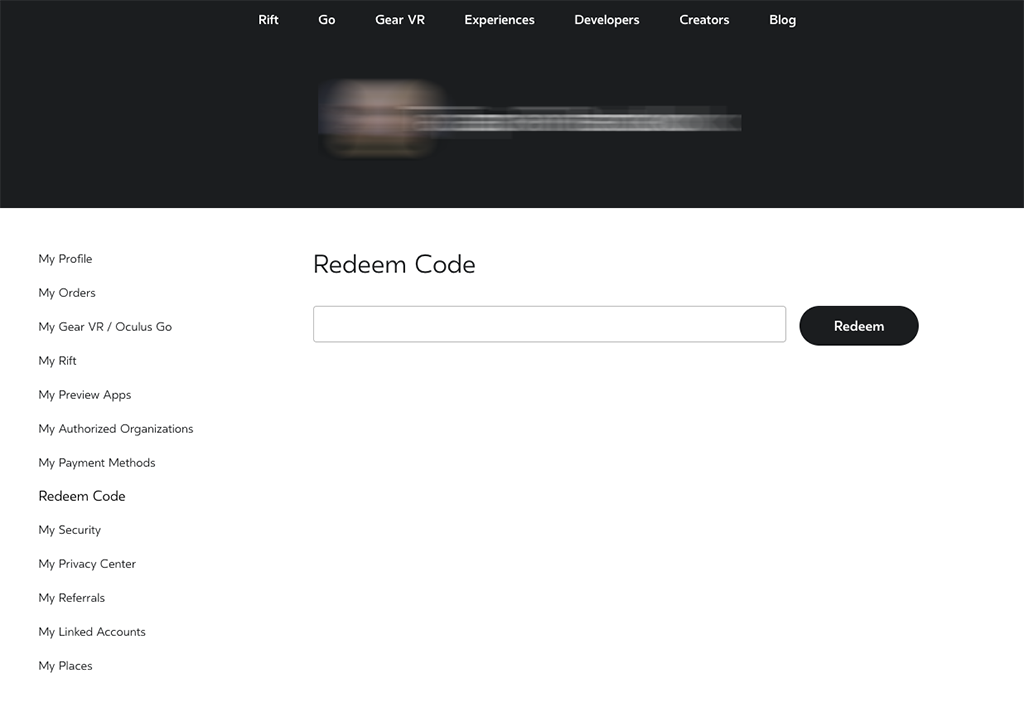
Next, redeem your Oculus key for the LiveSYNC app. There are multiple options, but perhaps the easiest is to use Oculus' website. Open the following link in a web browser, log in with your Oculus account, and copy-paste your key to redeem it:
https://secure.oculus.com/redeem-code/
Note
Other options for redeeming an Oculus key are explained here:
-
After redeeming the key you have multiple options on how to install the application:
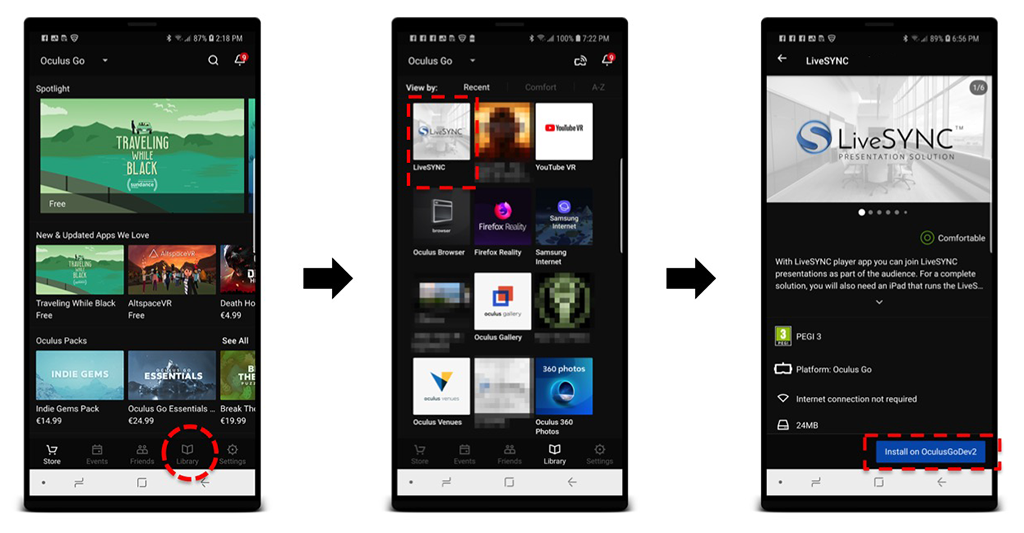
- Using the Oculus app on your phone: tap the magnifier glass icon to open search, type livesync and select LiveSYNC, then click Install on ... button.

- You can also select Library tab from the bottom bar and see if LiveSYNC already appears in the apps list (GearVR: check Not Installed tab). Select it from the list and then click Install on ... button.
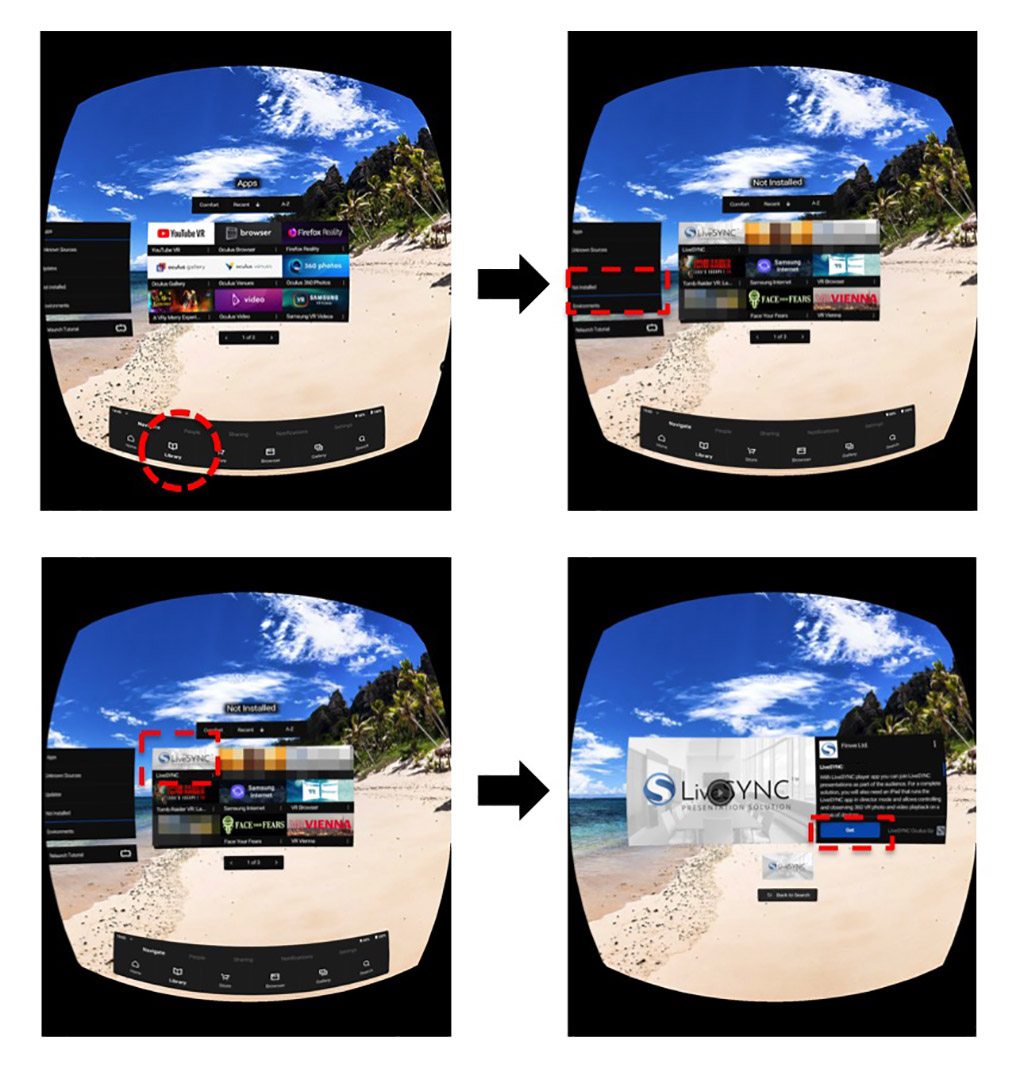
- Using the Oculus Go / GearVR headset, select Search from the bottom bar, type livesync, select LiveSYNC, then click Get.
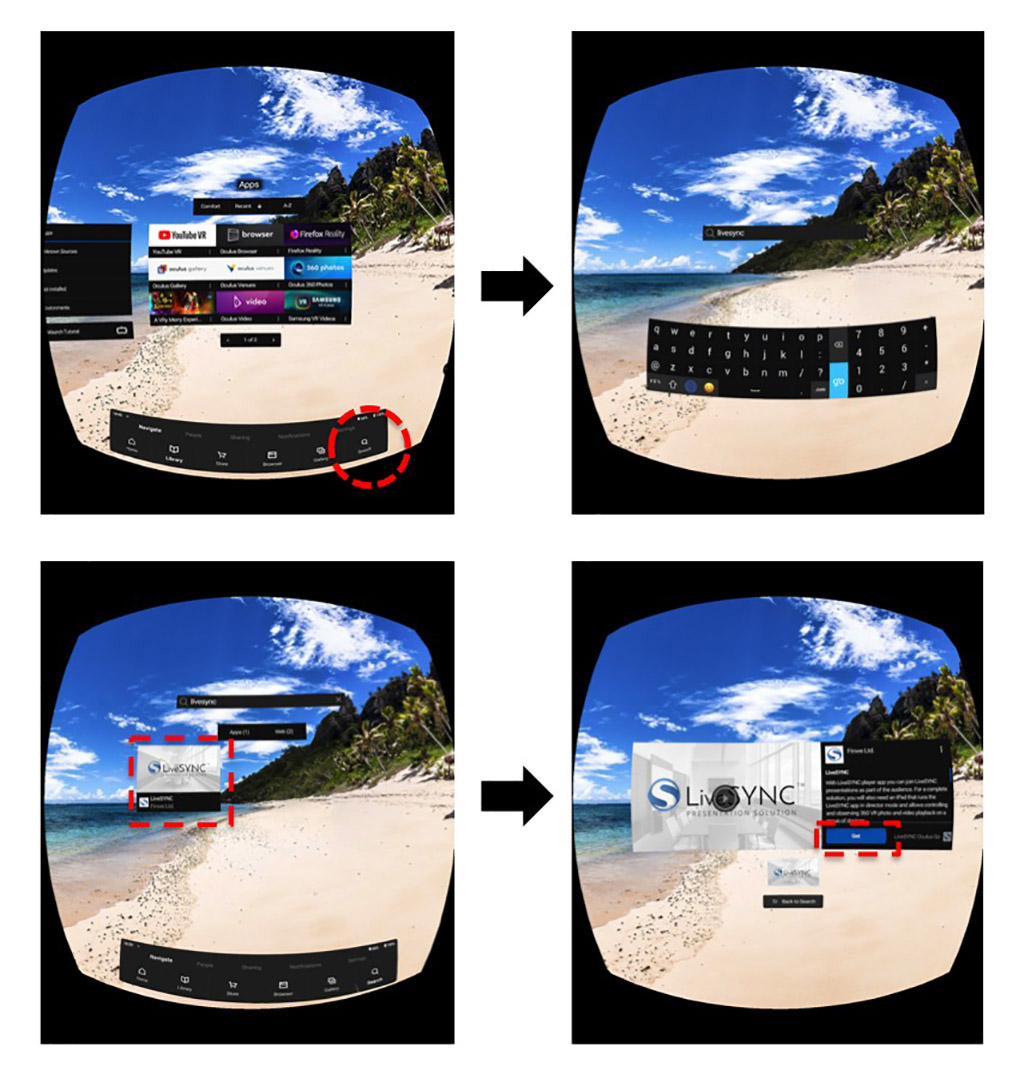
- You can also select Library tab from the bottom bar and then Not Installed page from the left side menu to see if LiveSYNC already appears in the apps list. Select it from the list and then click Get.
- Using the Oculus app on your phone: tap the magnifier glass icon to open search, type livesync and select LiveSYNC, then click Install on ... button.
-
When the installation has completed you will find LiveSYNC listed in the apps grid: Select Library tab from the bottom bar, and then Apps page from the left side menu (GearVR phone: My Apps tab from the top menu).
-
Start LiveSYNC by selecting it from the apps grid. (On GearVR, you can start the app from the Oculus app on your phone, or you can first enter VR and then start it from the Oculus Home.)

Note
Notice that the app's version number appears in the splash screen, in the small print below the LiveSYNC logo. Here you can easily check which version you are running. The LiveSYNC app is updated frequently.